I often get customers who are having problems getting Skype to work correctly - either video image is not showing or the person they are calling cannot hear them
Below is a quick guide to show you how to check and amend the settings for sound and video to get Skype working correctly
1) Firstly open Skype and sign in as usual
2) Now click Tools and then Options... (as shown in the image below)

3) Firstly choose the Audio settings tab and using the drop down arrow make sure the correct microphone and speakers are selected - by default this normally points to the built-in speakers/microphone in a computer (if present) - so you may need to select your Webcam microphone or headset depending on what device you use
Click Save when you have made your changes

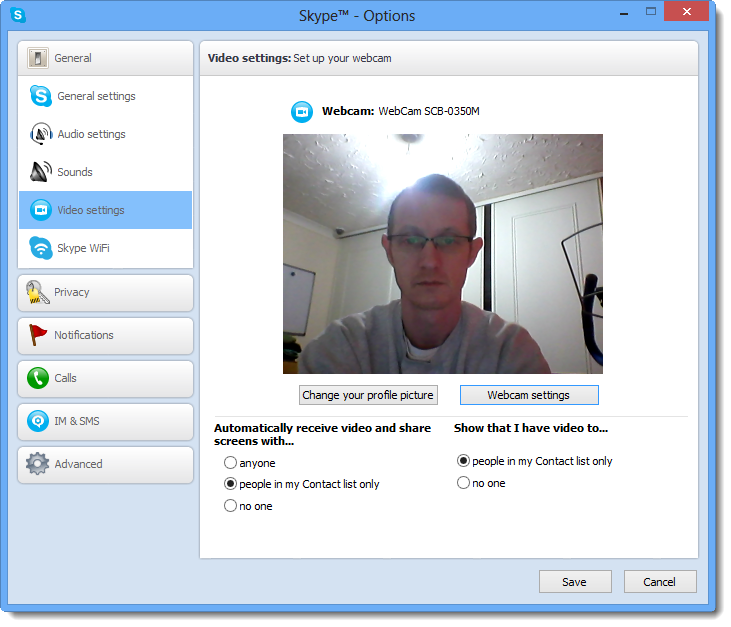
4) Now choose the Video settings tab and make sure that your Webcam is working and displaying an image
You can adjust camera settings by clicking Webcam settings
If no image is displayed then make sure your Webcam is plugged in and working correctly in the software that came with it - if not try reinstalling the software, or unplugging and replugging the camera (not relevant for laptops or built in cameras!)
Click Save when you have made your changes
5) Once you have checked that the speakers, microphone and camera are setup okay you can make a Echo / Test Call to confirm all is working correctly
To do this click Echo/Sound Test Service in the left hand column and then click the green Call button as shown below

6) Skype will then make a call to the test service and you should hear a recorded voice speak to you and ask you to speak after the tone - it will then play back what you said to confirm that speakers and microphone are working correctly
Once this is done and all is working correctly you can now add contacts and start speaking to your friends and family
